1. 개요
키보드(WASD)를 입력받아 C++코드에서 캐릭터 움직임을 구현한다.
2. 구현 프로세스
- 환경 설정하기
- 입력 액션 생성하기
- 입력 맵핑 컨텍스트 생성하기
- PlayerController 생성하기
- Move 함수 구현하기
- 블루프린트 생성하기
2.1 환경 설정하기
1. 플러그인 활성화

2. 입력 컴포넌트 설정

3. 모듈 추가
/* project.build.cs */
PublicDependencyModuleNames.AddRange(new string[] { "EnhancedInput", ... }
2.2 입력 액션 생성하기
1. 입력 액션 생성
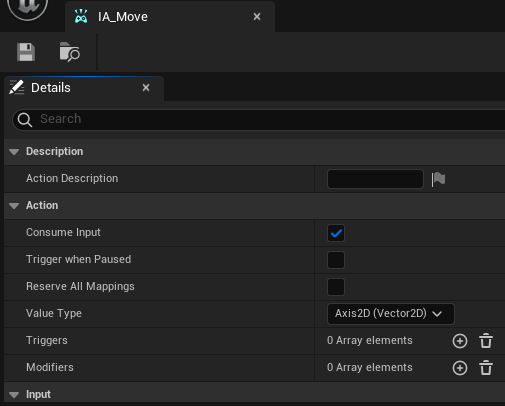
- Value Type을 Axis2D (Vector2D)로 설정한다.
2.3 입력 맵핑 컨텍스트 생성하기
1. 입력 맵핑 컨텍스트 추가

- 입력 액션(IA_Move)을 등록한다.
- D키는 오른쪽 이동키다.
- 키 입력시 1값이 X에 전달된다.
- A키는 왼쪽 이동키다.
- 입력 값을 반전한다. (Modifiers > Negate)
- 키 입력시 -1값이 X에 전달된다.
- W키는 앞으로 이동키다.
- 입력 값을 재구성(XYZ > YXZ)한다. (Modifiers > Swizzle Input Axis Values)
- 키 입력시 1값이 Y에 전달된다.
- S키는 뒤로 이동키다.
- 입력 값을 반전한다. (Modifiers > Negate)
- 입력 값을 재구성(XYZ > YXZ)한다. (Modifiers > Swizzle Input Axis Values)
- 키 입력시 -1값이 Y에 전달된다.
2.4 PlayerController 생성하기
1. 클래스 생성

2. 입력 매핑 컨텍스 등록
/* AAuraPlayerController.h */
UCLASS()
class AURA_API AAuraPlayerController : public APlayerController
{
	GENERATED_BODY()

protected:
	virtual void BeginPlay() override;

private;
	UPROPERTY(EditDefaultsOnly, Category = Input)
	TObjectPtr<UInputMappingContext> Context;
}- BeginPlayer() 함수를 오버라이드한다.
- 입력 맵핑 컨텍스트를 멤버 변수(Context)로 선언한다.
- 에디터에서 값을 설정한다.
- 에디터에서 카테고리명을 "Input"으로 설정한다.
/* AAuraPlayerController.cpp */
void AAuraPlayerController::BeginPlay()
{
	Super::BeginPlay();

	check(Context);
	UEnhancedInputLocalPlayerSubsystem* Subsystem =
    	ULocalPlayer::GetSubsystem<UEnhancedInputLocalPlayerSubsystem>(GetLocalPlayer());

	if (Subsystem)
	{
		Subsystem->AddMappingContext(Context, 0);
	}
}- 플레이어 컨트롤러가 생성되었을 때(BeginPlay) 입력 맵핑 컨텍스트를 등록한다.
3. 입력 액션 바인딩
/* AAuraPlayerController.h */
UCLASS()
class AURA_API AAuraPlayerController : public APlayerController
{
	...

protected:
	virtual void SetupInputComponent() override;

private:
	UFUNCTION()
	void Move(const FInputActionValue& InputActionValue);

	UPROPERTY(EditDefaultsOnly, Category = Input)
	TObjectPtr<UInputAction> MoveAction;
}- 키 입력시 바인딩할 함수(Move)를 선언한다.
- 엔진에 호출될 함수이기에 언리얼 매크로(UFUNCTION)를 등록한다.
- 입력 액션을 멤버 변수(MoveAction)로 선언한다.
- 에디터에서 값을 설정한다.
- 에디터에서 카테고리명을 "Input"으로 설정한다.
/* ATestPlayerController.cpp */
void ATestPlayerController::SetupInputComponent()
{
	Super::SetupInputComponent();

	UEnhancedInputComponent* EnhancedInputComponent = CastChecked<UEnhancedInputComponent>(InputComponent);
	EnhancedInputComponent->BindAction(MoveAction, ETriggerEvent::Triggered, this, &AAuraPlayerController::Move);
}- 입력 처리 함수(SetupInputComponent)가 호출될 때 입력 액션을 바인딩한다.
2.5 Move 함수 구현하기
void AAuraPlayerController::Move(const FInputActionValue& InputActionValue)
{
	const FVector2D InputAxisVector = InputActionValue.Get<FVector2d>();

	const FRotator Rotation = GetControlRotation();
	const FRotator YawRotation = FRotator(0.f, ControlRotation.Yaw, 0.f);

	const FVector ForwardVector = FRotationMatrix(YawRotation).GetUnitAxis(EAxis::X);
	const FVector RightVector = FRotationMatrix(YawRotation).GetUnitAxis(EAxis::Y);

	if (APawn* ControlledPawn = GetPawn())
	{
		ControlledPawn->AddMovementInput(ForwardVector, InputAxisVector.Y);
		ControlledPawn->AddMovementInput(RightVector, InputAxisVector.X);
	}
}- 컨트롤러의 회전값으로 전방 벡터와 오른쪽 벡터를 구한다.
- 회전 값의 Yaw축만으로 벡터 값을 구한다. (XY)
- 컨트롤러에 빙의된 폰이 있다면 입력된 값만큼 움직인다.
2.6 블루프린트 생성하기
1. PlayerController 블루프린트 생성

- C++ PlayerController를 상속받은 블루프린트를 생성한다.
2. GameMode 블루프린트 생성

- GameModeBase를 상속받은 블루프린트를 생성한다.

- GameMode 에디터 창에서 플레이어 컨트롤러(BP_AuraPlayerController)를 등록한다.
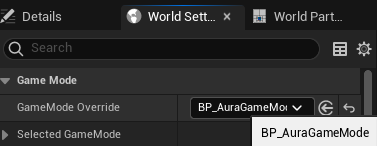
3. 월드 설정에서 GameMode 설정하기
3. 결과 화면
 0
0
'Unrael > Implement' 카테고리의 다른 글
| [UE/Implement] 미니 프로젝트 회고 (0) | 2025.02.13 |
|---|---|
| [UE/Basic] 치트 매니저 (Cheat Manager) (0) | 2025.02.12 |
| [UE/Implement] 트랩 구현 (0) | 2025.02.11 |
| [UE/Implement] 액터 하이라이트 표시하기 (0) | 2025.01.02 |
| [UE/Implement] 쿼터뷰 구현하기 (0) | 2024.12.31 |